Monday, April 28, 2008

Bulkhead Patch

I finished the stringer I've been working on forever. Including the time I had to let it dry out after the bilge got wet, I've been working on it for about 3 weeks worth of days off. It's a good thing my dad and I aren't working on this project together. That type of thing drives him nuts; when things take too long.

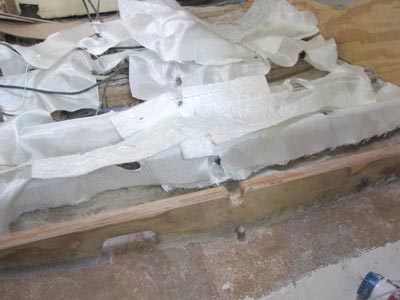
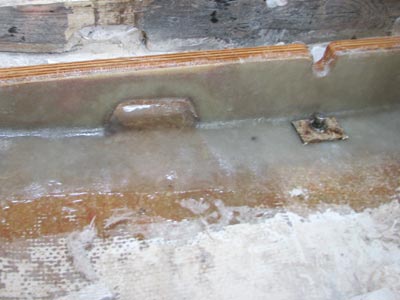
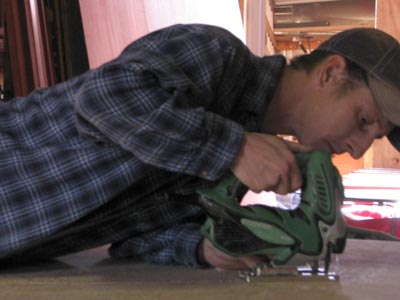
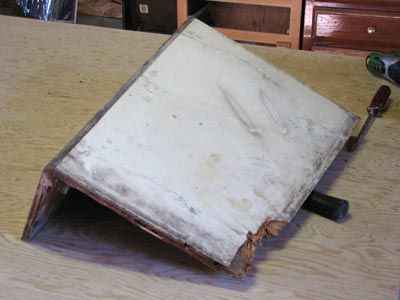
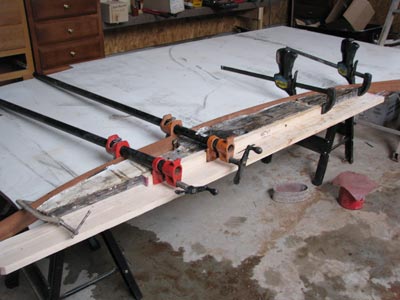
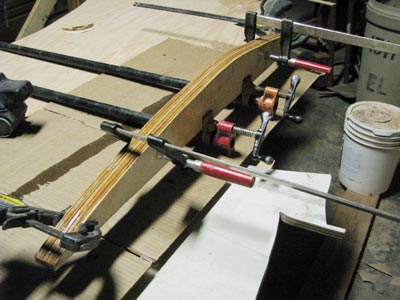
In fact, there are a lot of things he and I would butt heads over. He has more of a dive-in-and-take-the-bull-by-the-horns philosophy, where I like to step back, analyze, plot, crunch numbers, read up on what others have done, model it in 3D on the computer, make drawings, think about it some more... and then go do it. For instance, he's building a barn right now and he's doing it without so much as a single drawing. He knows what he wants to do in the general sense, but largely, he's making the details up as he goes along. We are poles apart in that respect. Especially if it's something I've never done before. When I throw myself in the middle of a project where I lack the experience to do it intuitively, I spend tons of time just sitting and staring at it. I'll sit in a corner of the boat, sip a cup of coffee, smoke three cigarettes and work out the details in my head step-by-step before I ever think about picking up a tool. In total, I probably spent 6 hours worth of time trying to decide on how I was going to fiberglass the stringer in place. I went over each detail; how many layers of cloth I would use, how I would cut it, in which order they would be laminated, and so on. I eventually got it done, though, and I have to say I'm happy with the way it turned out. It looks nice, but more than that, I'm pretty confident it's completely sealed and structurally sound.
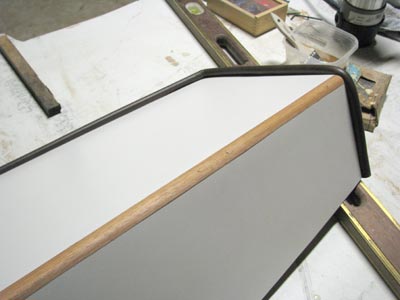
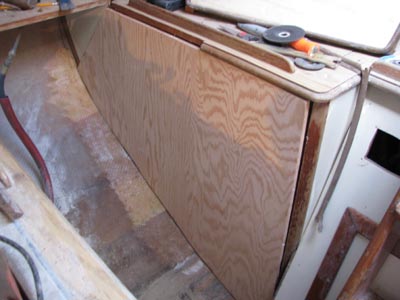
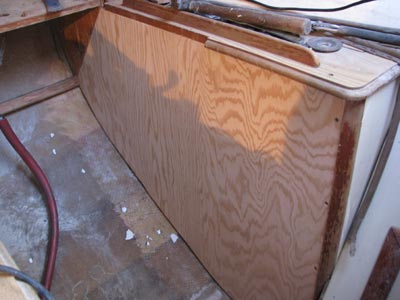
1
Finished stringer.

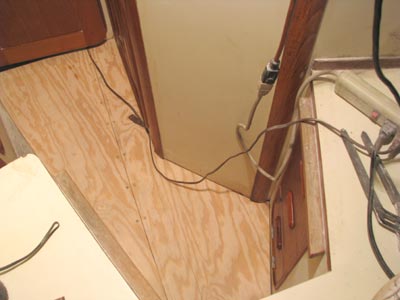
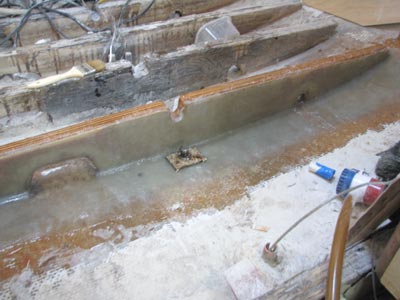
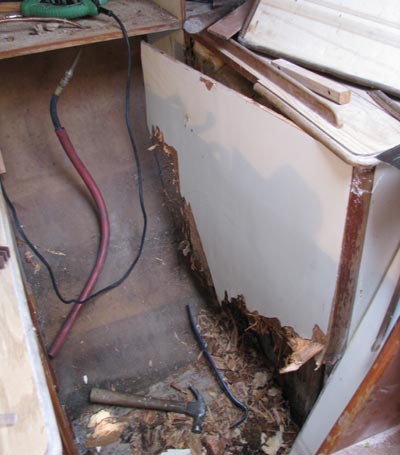
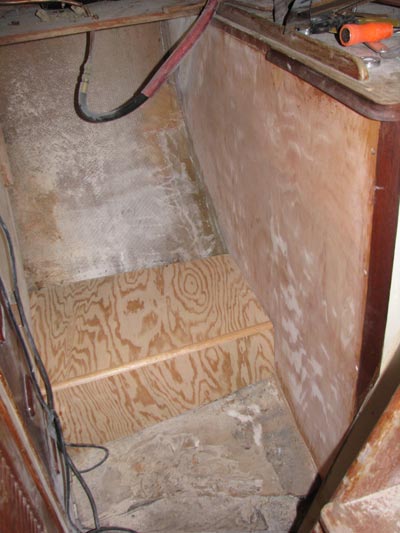
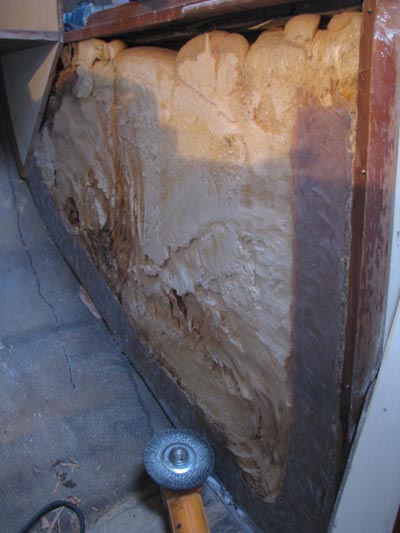
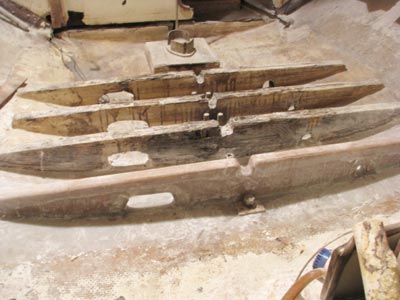
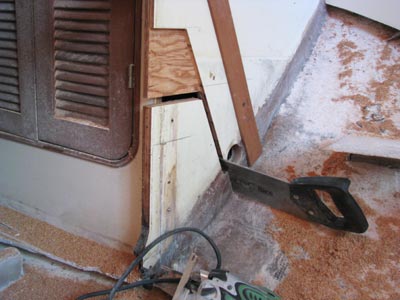
After finishing the first of the large stringers, I jumped on to the next one. This time I didn't need two hours to study it. The first one worked out great, so I knew exactly what I was going to do and how I was going to do it. As you can see from the pictures below, just like the other large stringers, it's not enough that the wood was completely rotted, the fiberglass that held the stringer to the hull had also delaminated.

2
Delaminated fiberglass

3
Stringer rotted to dust.

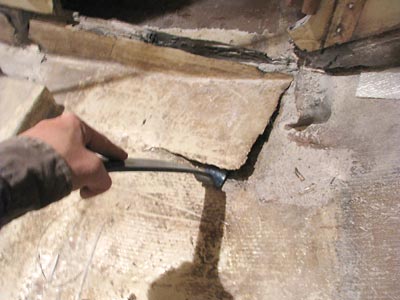
However, after I ground the stringer out, I was presented with a new problem. Unlike the stringer I had just finished, this one left absolutely nothing from which to make a pattern. That meant I had to go back to the popsicle stick trick to make a pattern. The only trouble this time, though, was that the stringer was too tall to use popsicle sticks. Solution? Bigger popsicle sticks. I had cut up a piece of popular into small stakes and use those to articulate the curvature of the hull. It worked out perfectly. The test piece I cut from ¼” plywood fit on the first try. Either I got lucky or I'm getting pretty good at this pattern making thing.

4
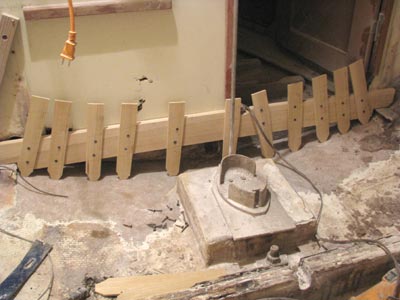
Stakes used to articulate the shape of the hull.

5
Fairing baton clamped to the pattern in order to trace the bottom of the stringer.

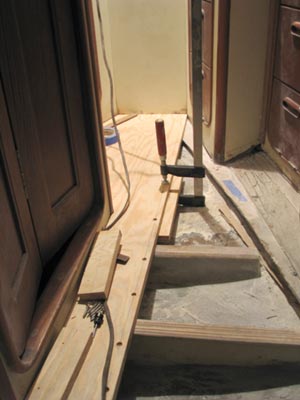
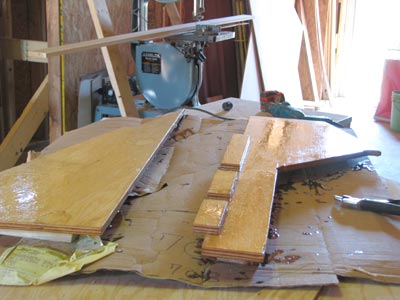
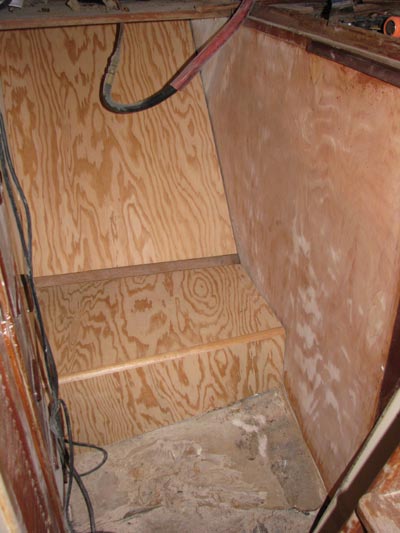
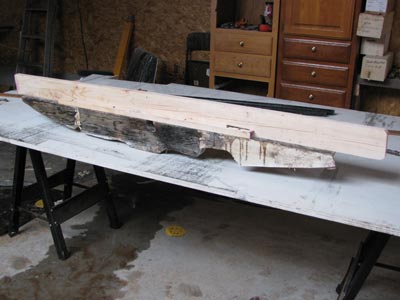
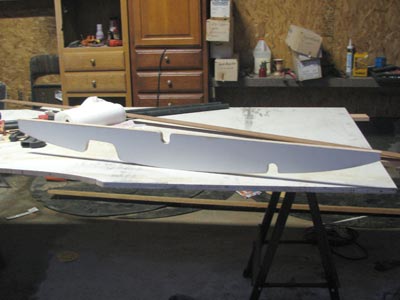
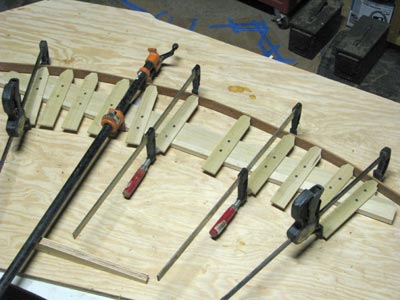
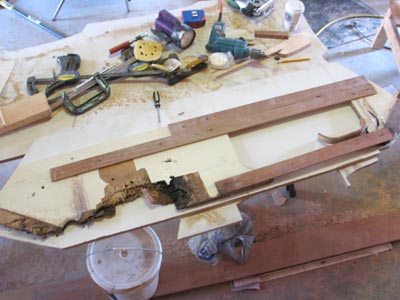
Pattern in hand, I went ahead and cut the ¾” marine plywood for the actual stringer and epoxied it together before I went to bed that night.

6
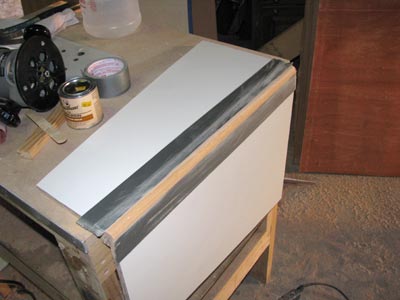
Stringer pieces clamped and epoxied together.

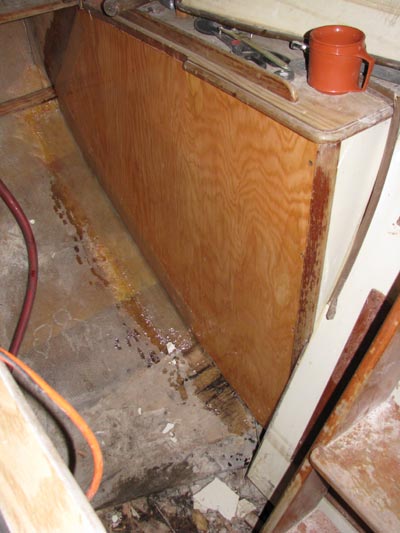
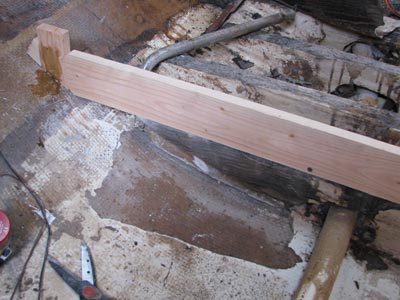
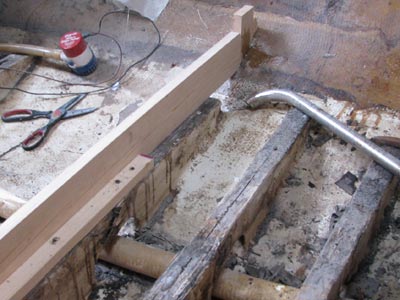
Had this been one of the stringers in the middle of the bilge, I would have gone ahead and glued it in place the following day, but this one rests directly under the main bulkhead and that presented a new challenge. The bottom four to five inches of the main bulkhead is rotted and had to be replaced. In order to fix it 100%, I suppose a guy would have to replace the entire bulkhead., but I had no intentions of doing anything of the sort. I'm going to a lot of trouble to fix this thing, and while I do want it done right, it's always going to be an old boat and somethings are going to have to settle for 80% patch jobs instead of 100% replacement. The only question was, how was I going to patch it. That's what I spent my spare time at work the following day thinking about.

The strongest way to join a patch to the existing bulkhead would be a scarf joint, but I didn't see any realistic way to do that with the bulkhead still installed. I figured the next best thing would be a half-lap joint. The trouble with that, though, is that while the core layers of the plywood have a strong bond, the outer layers are just butt jointed. I went over various ways of doing it and finally came up with the following drawing of what I wanted to do.

7
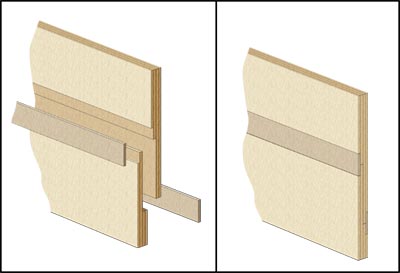
Hybrid half-lap joint drawing.

Instead of just a traditional half-lap joint, I decided I would cut the half-lap with the router, and then cut an 1/8” plywood inlay to reinforce the butt joint of the outer layers. In effect, I'm ending up with a half-lap in the middle and some kind of hybrid between a half-lap and butt joint on the outer skin of the plywood.

In addition to cutting the half-lap with the router (which I made about 6” wide), I also used the router to cut through the bulkhead. It gave me an extra clean cut and also allowed me to cut the bulkhead exactly ¾” deep without cutting the structure and woodwork behind it. Of course, the router wouldn't cut all the way to the hull, so I had to cut the last 3” with the jigsaw and then the rest of the way by hand with a miter saw.


8
Routering the inset on the bulkhead side of the half-lap joint.

9
Cutting the bulkhead with the router.

10
Finishing the cut by hand with a miter saw.

11
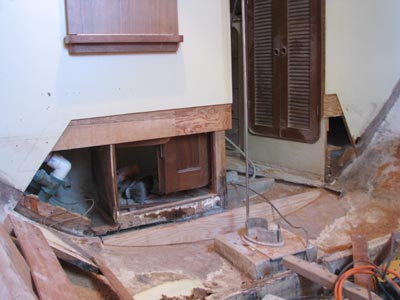
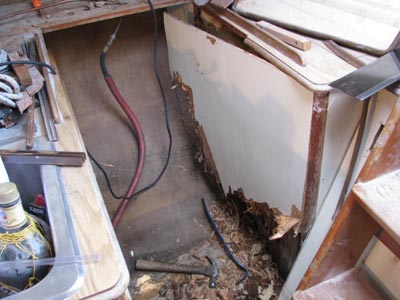
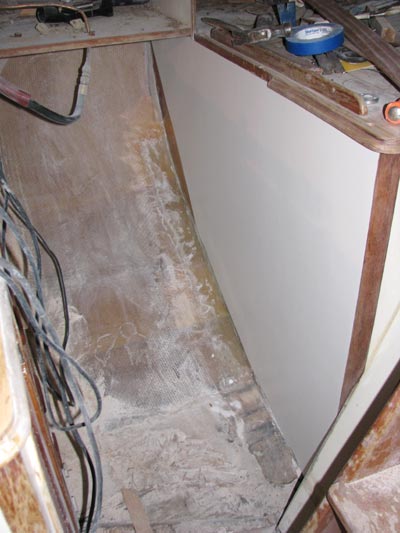
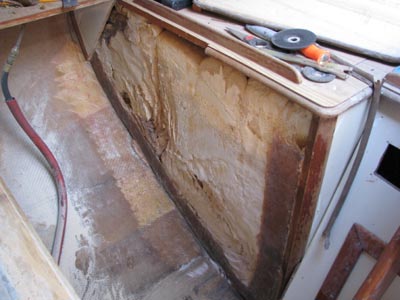
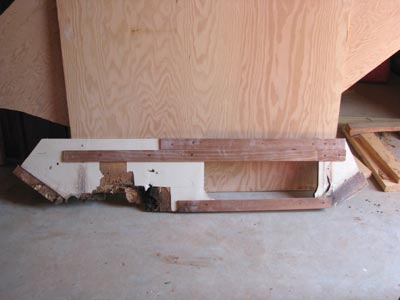
Rotten portion of the bulkhead removed.

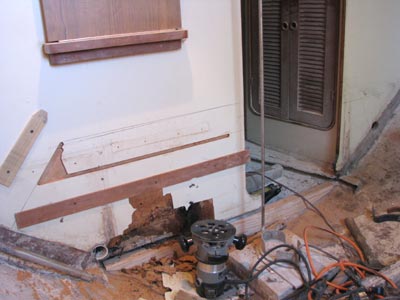
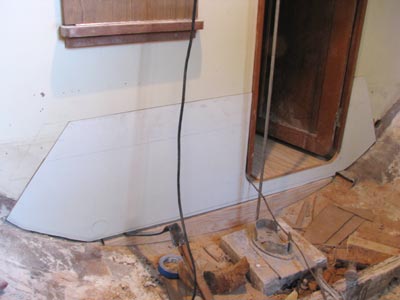
One of my main concerns was making sure I got the hole for the door cut right. Since the bottom below the door had completely rotted away, I made sure to reinforce it so it wouldn't move before I cut it completely out.

12
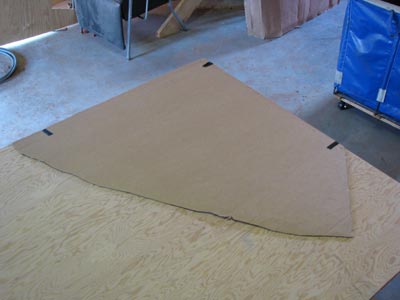
Pattern for door opening.

After sanding and adjusting the plywood for the patch and getting it where I wanted it, I used the old piece of the bulkhead to draw the opening for the door.

13
Tracing and cutting the opening for the door.

14
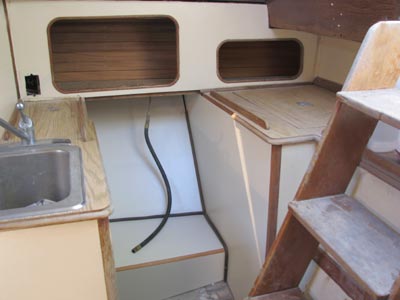
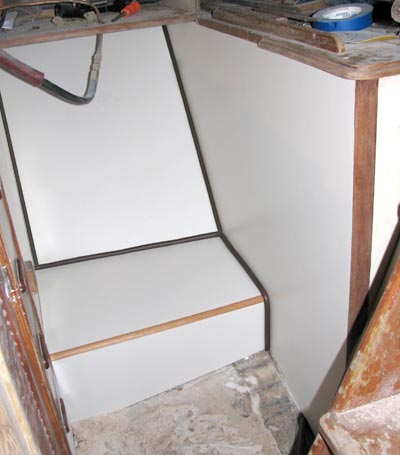
Door reinstalled to test fit.

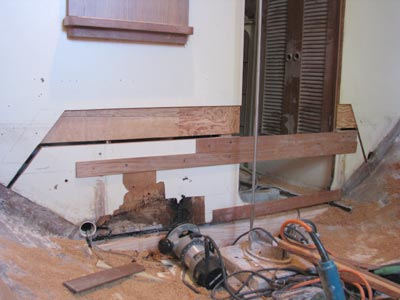
With the patch completely cut and sized, I drilled and countersunk 8 stainless steel screws across the half-lap joint.

15
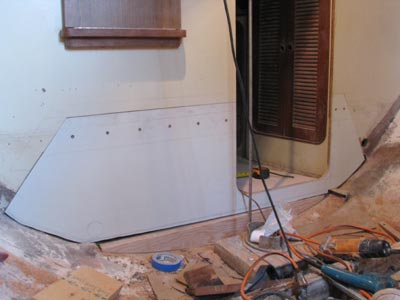
Eight #12 stainless screws installed.

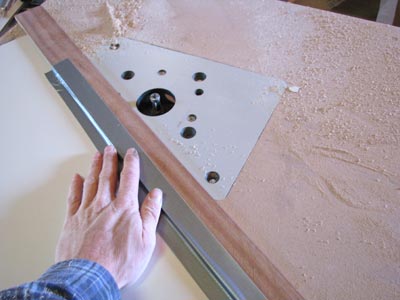
The next thing to do was to cut the plywood inlays that would reinforce the butt joint of the outer layers of the plywood. To do that I used pattern and an inlay guide on the router. If you've never used one before, the inlay guide is one of the coolest things ever. You can make any pattern you want, trace around the inside of it with the router to remove the material and create the inset for the inlay, then with one modification to the guide, use it again to cut the actual inlay from another piece of plywood. The fit is absolutely perfect.

16
Pattern for the router inlay guide.

17
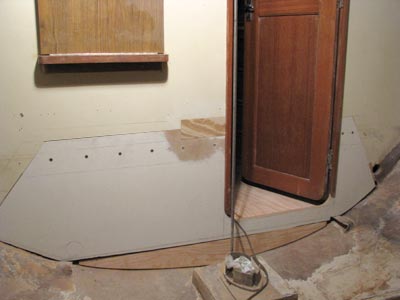
First inlay in place.

All told, the half-lap joint is 6” wide, has 8 screws, is reinforced with plywood inlays at the butt joints and will be glued with epoxy once I'm ready to make the joint permanent.

Tomorrow I plan to cut the rest of the inlays, grind the fiberglass tabbing back for replacement, cut the bottom of the patch to the right height and start working on gluing the stringer below the bulkhead in place.

Wednesday, April 23, 2008

More Stringer Work

I spent most of Monday working on fitting the substrate for the sole in the v-berth and fiberglassing the stringers I glued in place about a week ago.

My first attempt at a pattern for the plywood in the v-berth was a disaster. I got the bright idea that I would cut out cardboard shapes and use a little epoxy to glue them together. Didn't work. I got in a hurry and moved the pattern before the epoxy set. Everything moved and the piece of sacrificial ¼ plywood I cut was off by as much as an inch in some places.

The second go-round I made things a little simpler. I used the cardboard for the overall shape, but this time I just used making tape to hold everything together. I cut a rough shape and then cut smaller pieces that followed the edges and corners of the walls and tapped them down. It worked perfectly. The second one fit within an 1/8 of a inch all the way around and that's what I was looking for.

1

Unfortunately, the shape of the floor in the v-berth wouldn't allow for once piece of ¾ inch plywood to fit. The geometry was just too complex. I ended up having to cut it into two pieces and join those together down the middle.

2

After a little bit of sanding and adjusting, I finally got it though. After I got the pieces cut and joined together, I covered them on 6 sided with two coats of epoxy to seal it.

3

I'm still not real sure exactly how I'm going to glue it down. I don't know if I should use some 3M 5200 and glue and screw it down permanently or if I should use a slightly weaker adhesive in case I ever need to take the pieces out. I'm leaning towards permanent. I can't imagine wanting to take it out. I'll tell you this much, though, it sure felt nice to stand there on a flat, solid floor instead of walking through the bilge on bare stringers. I will be tickled to death to see the rest of it done.

The rest of the day I spent working on fiberglassing the stringers. I did the last of the smaller stringers in the v-berth first because I wasn't sure how the epoxy was going to behave at 80 degrees. I know when I was working with it and it was 50 degrees outside with about 60% humidity the stuff took forever to kick. When it was in the 50's, even though I was using the fast hardener, the pot life on it was about 20 minutes. That was not an issue today. In fact, the first batch I mixed up jelled before I could use it all. It kicked in about 6 minutes and started steaming in the pot.

Obviously, when I glassed in the second and much longer stringer, I switched to the slow hardener. It was perfect. I had just enough time to wet everything out and work with it before it stated to jell. I was afraid it was going to kick before I could get all the layers of fiberglass down that I wanted. I wanted everything done wet on wet because I didn't feel like waiting around, sanding it all down, and laying up more fiberglass.

4

As it turned out, everything went down in one shot and the epoxy kicked shortly there after. On top of that, it only took about 3 to 4 hours for it to cure. That's much better than the nine to ten hours at 50 degrees. What felt like it took forever today was pre-cutting all the cloth I was going to use. I had the stuff strung all over the place. I used 6 layers of 10 oz. cloth in all on each side and 3 layers of mat in the middle to bulk it up like it was originally. It used up an enormous amount of epoxy, but it ended up being about a half an inch thick in the middle around the keel bolt, which is what I wanted. I swear, though, I'm burning through $140 a gallon epoxy like some people buy milk. I just bought another gallon the other day and it's almost gone. It makes even gasoline seem reasonably priced. I'm seriously considering buying 5 gallons of it at a time because (a) I'm going to use that much and (b) it's slightly cheaper. Buying it a gallon at a time is going to cost about $700. If I get 5 gallons at once, while it may be a bigger initial bite, it works out to about $500 bucks.

5

6

Tuesday, April 15, 2008

A Little Less Toadly

“The big, fat toad I call a boat”, as my friend Wes once referred to it, is starting to look a little less like a toad. Perhaps even a little princely (a very old and neglected prince in need of some serious cosmetic surgery, but still, not a toad, not entirely).

BEFORE:

apr83

AFTER:(Current Progress)

7

Galley Half Fixed.

I opted for the laminate over painting the plywood in the galley. It was more work, but it matches everything that I'm not going to replace and it wears better anyway. On the up side, I got one hell of a deal on the laminate. I went to a secondhand lumber yard here in town just to see what they had. It was perfect. They had one piece almost exactly the same color as everything else in the boat and they only wanted .35 cents a square foot for it. At a 4X12 foot sheet, that worked out to about $16. The had a sign over the bin that asked that you wait for assistance, so I did. Forever. I asked three different people to help me. None of them did. Eventually I got tired of waiting so I just rolled it up, slapped some tape on it and walked to the counter. The chic at the register asked me if anyone measured it for me. I said no. I told here after waiting too long I rolled it up myself. She said, “how about five?” I said, “five what?” She said, “Five dollars.” I said, “Ah, yeah, that works, five it is.” That was certainly the deal of the day. I paid more for the router bit to trim it than I did the laminate.

The only trouble was, being from a secondhand lumber store, the edges were less than perfect. I wasn't sure how I was going to straighten them up without the use of a table saw. That's when I hatched a plan. Like everything else improvised in Oklahoma, I started with some duct tape and a stick. Most of the pieces I needed to cover could easily be trimmed outside the boat, but I need a piece that would fit exactly the plywood I installed that covers the icebox. What I came up with was a piece of hard wood duct tapped to the top of the laminate that I then trimmed on the router table. It worked perfectly. I couldn't have asked for a better fit.

1

2

Covering everything else, of course, was laminate business as usual. I covered the two pieces that fit behind the stove, cleaned up the quarter-round trim I made yesterday, and made some final sanding adjustments to make sure everything fit. All in all I was very pleased with the way it turned out.

3

4

I thought about cutting some mahogany trim up and trimming the whole thing out with that, but the truth is, the corded trim they used originally is so much easier to work with. The guys downtown didn't have any in stock, but they did have the rubber cord and the material I wanted to cover it with, so I said to hell with it and made my own. I fired up the sewing machine and awhile later I had just what I wanted. I think it turned out nice. It is completely, 100% replaced with new material. The best plywood, sealed in epoxy on 6 sides, laminated, trimmed and screwed in place. Including going to get the materials, I worked at it for about 12 hours today.


So, to recap. I went from this a few days ago:

5


To this a few days later.

6

Monday, April 14, 2008

The Battle of the Bilge

A storm came threw the other night. This presents a problem. All the portlights are in place, but non of them are sealed. I have the forward hatch out and the plastic covering the gaping hole left behind is doing a poor job. Nothing is sealed back in the cockpit either so it basically acts like a giant rain-catch leading straight to the bilge.

I had a roll of black plastic stretched across the entire boat, but the storm shredded it. And when I say storm, I mean the type with straight-line winds that picked up 30lbs wooden pallets and sent them pinwheeling through the air. In fact, one of the pallets flew about 40 feet from where I had it stacked and it hit the back of my truck. It busted out the rear glass and caved in one corner of the cab. That was nice. A little added bonus. The bilge I recently dried out is now wet again...and I got a brand new, custom storm-designed, dent and window removal thrown in for free!


crunched truck

The boat didn't get a lot of water in it (about an inch), but considering I hadn't glassed in the stringer I had just set in place, it got it wet right at the bottom edge of it. I dried everything out again, but I'm still going to give the wood another week to dry completely. The last thing I want to do is permanently epoxy moisture inside the stringer.

In the meantime I went back to work on the galley.

icebox

I bought some more plywood, but this time I went with marine grade instead of the MDO. It's more expensive than drugs, but I think it's worth it. The guy that sold me the MDO convinced me it was every bit as good as marine grade, only less expensive. He said the MDO was made of the same wood as marine grade, used the same laminating glue and had no core voids. I gave it a shot, but when I cut into it, guess what I found? Core voids. Granted, they were small and there weren't very many of them, but they still existed. I was not happy with that. I returned a sheet of 3/4 inch MDO and bought 3/4 inch marine grade instead. It's $82 a sheet, which is expensive, but in reality, it's only $20 a sheet more than the MDO. I would just as soon spend the extra twenty bucks and have the peace of mind knowing I didn't cut corners.

I got the rotted plywood out that covered the icebox and replaced it with a new piece. I used a sheet of cardboard and a box knife to cut a pattern for the piece I needed to replace and then transferred that to a sheet of 1/2 plywood.

pattern

cutting

Once I got the piece cut, I took it to the boat and made some final adjustments with the belt sander and test fit it until I got it in place.

test fit

Once I was happy with the fit, I drilled pilot holes and countersinks for the screws and got it set up the way I wanted it.

final fit

With the new piece ready to install, I painted all the edges and the entire back side of the piece with epoxy to seal it. I also mixed up some more epoxy and added a little filler to thicken it up and then painted that on the tabbing that held the old piece in place. I laid it on pretty thick and installed the new piece while the back and sides were still wet so they would adhere to whatever they touched on the back side.

With the new piece glued, screwed and epoxied in place, I fiberglassed the butt joint and tabbed the whole thing in place. Personally I think it looks pretty good and I don't think it's going anywhere. It's also sealed on 6 sided with epoxy which is a much better than what came out of it.

final fit

While the epoxy was setting up on the icebox panel, I switched gears and rebuilt the cabinetry that covers the hull below and behind the stove. Fortunately that stuff, though suffering from some rot, stayed pretty much intact when I took it out. That meant I could use the original pieces as patterns for the new ones. The hard part was recreating the quarter round molding without the use of a table saw. I have to rewire the switch on the table saw, so I had to create the molding on the router table.

final fit

final fit

final fit

I thought about several ways of putting a finish on the plywood. Obviously, I could cover it in resin, sand it flat and paint it or I could go a head and cover it with a laminate. The paint would be easier, I think, but it would also be a maintenance headache. I'm afraid I would be constantly repainting it and touching up scratches. I'm going to look at my options later today and see what I come up with.

After today, I can tell you one thing for sure. There isn't a square or straight edge in the boat. Everything is a tailored fit of compound angles and beveled arcs.

Monday, April 7, 2008

Always Darkest Before The Dawn?

There are times when I start the day by scaling the makeshift scaffolding of old pallets I've stacked up to the deck of the boat, look down the companionway into the belly of this poor wrecked soul and think; “My god, what have I done?”

The word, 'Gutted' would not be an overstatement. Half the cabinetry has be disassembled or torn out, rotten strings lay bare and not a crevice, nook, or cranny is free of dust and debris. I'm extremely sensitive about it too. Normally I won't let anyone I know look at it in its current state. When people see it for the nightmarish mess it has become, even though they are always kind with their words, I can see the judgment in their eyes – and I hate that.

It didn't look like this when I bought it, and even though I knew these things would have to be done (like ripping out rotten wood and stringers), it still makes me ill to saw and grind on it sometimes. It makes me ill to see it like this. The only bright side is, I've torn it down about as far as it needs to go. Most everything from this point on is building it back up.

Some things are starting to look better. I've replaced all the stringers in the v-berth and I got one of the large ones in the cabin epoxied in place today.

Stringer

Stringer

Since nearly everything I do requires watching epoxy cure for 5 hours, rather than eating bonbons and watching daytime TV, I've gotten really good at keeping two projects going at the same time. I go as far as I can with one project and then switch over to the other while the epoxy is drying on the first. It not only keeps me from twiddling my thumbs, it also ensures that I don't get impatient and start messing with things before the epoxy is fully cured.

The other project I have going is replacing the plywood that covers the icebox in the galley. It didn't look bad on the surface, but you could shove a screw driver through it just about anywhere near the bottom. It was an ugly removal, but the rot had to go. It was also a pain in the ass. Everything back in that corner overlaps and is interconnected. That may give it strength, but it also makes removing any one piece of it a chore. To remove part “F”, parts “A, B, C, D, and E” have to be removed.

It took some doing, but I eventually got it removed and cleaned up. A wire wheel on an angle grinder works wonders, by the way – although I wouldn't suggest using one without a guard like I did. Without the guard, your knuckles are about a half an inch away from a spinning wheel that will eat through fiberglass if allowed. I'm pretty sure it would clean a knuckle to the bone quicker than you can blink. I wore heavy gloves, it's still a bad idea. Once I get another sheet of 1/2 plywood, I'll cut, glass, and epoxy a new piece in place. Right now all I have is 3/4 inch and I can't use that.

Icebox

Icebox II

Thursday, April 3, 2008

Replacing Cabin Stringer

I guess my day was pretty productive. The first part of the day I was on a fiberglass cloth hunt. West Marine is way too proud of theirs and I need a lot of it. I think they wanted something like $300 bucks for a 10 yard roll of 50” wide 12 oz. cloth. I knew someone in town had to have the stuff cheaper. I went to 3 different places until I found what I wanted. One of the first two guys wanted to sell me chopped strand mat and was trying to convince me that it was stronger than cloth. Either he's an idiot, or he thinks I'm an idiot, or someone bequeathed him a thousand yards of the stuff and he really, really wants to get rid of it. Either way I wasn't buying. The other of the first two places I stopped proclaimed to be a boat shop, but what I found inside was an outboard motor museum tended by a cantankerous curator who would rather be fiddling with gears than talking to me about fiberglass. I've never seen anything like the place. It was literally a maze of disassembled motors (some of which I'm sure were older than me) and precariously stacked boxes of spare parts. I suppose if you ever need a part for some obscure and obsolete outboard built in 1962, he's your guy.

I think my third and final stop fell straight out of the sky from heaven. It's no more than 5 miles from my house, their only business is building fiberglass component parts for industrial equipment, two of the employees were eager to talk to me about my boat and offer advice, they had rolls and rolls of every type of fiberglass I could ask for, and they only wanted $10 a yard for the stuff I wanted. ...Sweet! There may be other things I need from West Marine, but when it comes to fiberglass cloth, they can go jump in a lake.

I spent the rest of the day working on replacing stringers and crawling in and out of the boat a thousand times. I swear to god, I need two sets of power tools. One set to keep in the boat and one set to keep in the shop. The boat and the shop are only 150 feet apart from each other, but every time I turn around, if I'm in the shop and I need the jig saw, you can bet it's in the boat. If I'm in the boat and I need the orbital sander, you can bet it's in the shop. This goes on, and on, all day long. Add to that the fact that the boat's deck is 13 feet in the air, and by the end of the day I've climbed an Eiffel tower worth of steps - or so it feels, anyway. I don't think I can honestly justify two sets of power tools, but I'm definitely doubling up on the cheaper stuff. I don't want to have to crawl back in the boat because I forgot a box knife or a tape measure. There will be boat tools and shop tools, and a strict law of apartheid enacted.

All bitching aside, I did get a lot done today. I cut one of the large stringers in the main cabin out, built a pattern for a new one and got it cut and laminated together. It's really only costing about $50 in materials to replace the large stringers, but the labor and waiting on epoxy to dry is what eats up a day. But then again, I'm not working feverishly, either. I have the radio on, and I take lots of smoke breaks and coffee breaks, and I work at a comfortable pace that allows me to enjoy what would otherwise be hard labor.

Unfortunately, getting the old stringer out was a snap. I say unfortunately because had it been stuck down properly it should have been a pain in the ass to remove it. That was not the case at all. Once I ground through the outer fiberglass with an angle grinder, it virtually popped out on its own. That turned out to be a blessing in part, though, because I was able to use most of the old stringer as a pattern for the new one.

Before I removed the old stringer I jigged up a brace that ran across the top of the stringer and reached to each side of the hull. I temporarily tabbed a block of wood with polyester resin at each end of the brace so I could reposition the new stringer in exactly the same position and height as the old one.

brace

brace

With the old stringer out, I took it to the shop and worked on making a pattern for the new one. Because the old stringer stayed mostly intact, this was a simple matter of wrapping and clamping a thin piece of wood around the bottom edge of it.

old stringer

pattern

Once I had my pattern drawn on the new plywood, it was a simple matter of cutting it out with the jigsaw.

new halve

I cut the two halves I needed to make one stringer and laminated them together with epoxy.

two halves

two halves

The only thing left to do now is seal it and glass it in the boat (that's all, huh? Yeah, figuring in time for the epoxy to cure, that will take all day). Only 7 more to go!